15 Secrets in real estate in Metro Vancouver
Metro Vancouver real estate.
There are many real estate investment strategies which you may employ to produce a profit but just one way to make a whole lot of cash,if you know the intricacies of foreclosure investments. Purchasing properties to sell for profit from Metro Vancouver homes and areas like Burnaby is an outstanding method of earning money through real estate investing but just in a few circumstances. Flipping properties to make money can be a risky investment since the laws are extremely strict about who can buy and sell a property and that should be asked to undergo the procedures of due diligence. Bearing this in mind,it would be helpful to learn the fundamentals about being a real estate investor procedure before getting on your approach to retirement.
The very first issue is what you’re prepared to lose to be able to receive the best return on your investment and how much you desire to spend. In order to make a good investment,it’s important to keep two things in mind. The first is that the marketplace is shifting every couple of years. Which it is possible to determine if you need to sell or hold,you have to have info about the latest trends in the industry. The crucial point is the fact that it is more rewarding to buy homes that are in the process of being marketed then to buy those properties which are sold and provide them to another buyer.

In addition to these factors,you also will need to think about the positioning of their property markets. People invest in areas where there is a demand for home and other properties. Many investors concentrate on areas they believe have been in high demand and they’ll then buy properties in these areas making a profit and thinking that they will be selling. However,this can be a mistake because the requirement for residential properties is changing and they can be very difficult to sell.
10 Situations When You’ll Need to Know About Canadian real estate investing
The buzz on the North Vancouver homes for sale and home prices - in the past couple of months has been nothing short of unprecedented and exciting. The boom continues to create jobs for people from all around the planet,which makes the standard of life increasing and the economy.

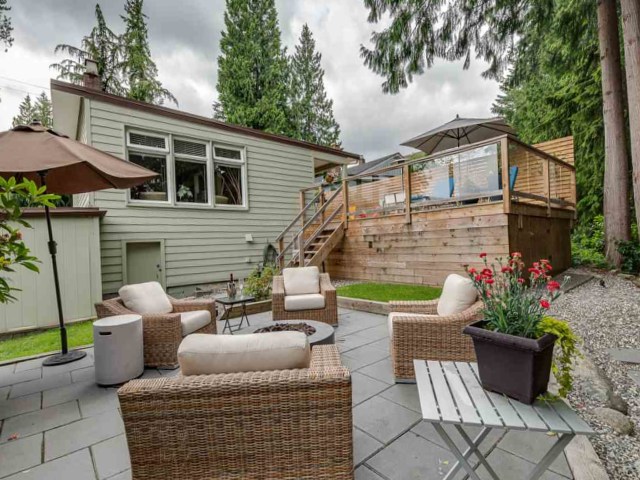
Before going on to find Vancouver condos for sale you - must decide what price range you are looking at. You might want to begin with a price range of one to two million bucks,however the truth is this price range is only a starting point and one that you can customize to satisfy your requirements.
That implies that MLS values currently exceed numerous regional counties in the US if you think about that number. But on a macro level,the figures are shocking. And if you look in Vancouver independently,you see that on an MLS basis,the region encompassing condos in downtown Vancouver is the size of the downtown region.
This is a good thing for home buyers. After all,it is very difficult for anybody to justify the cost of a downtown Vancouver condominium while spending close to double the quantity of money in a suburb like West Van or even South Granville. And let’s face it,the west side of Greater Vancouver is one of the most beautiful areas of the entire city.

It’s not always easy to fit up the items which you are searching for with the services you are currently using,so it’s helpful to be able to search through a number of unique sites at once for home buyers. Once you’ve used all of the various sites,you will have the ability to restrict your search,simply by searching for homes based on whether they are single-family homes townhouses,condos,or even multi-family units.
Even though the price ranges you are considering will ascertain the home you are considering,it is important to keep in mind the pricing along with the styles will likely probably be somewhat different. By way of instance,if you’re looking for a luxury home,then the price you pay will probably be a bit greater than if you are currently searching for a two bedroom townhouse in an older neighbourhood. The cost of a home will be based on the conveniences available for you.
In the event you will need a great deal of room,you need to think about the price range that is lower to make sure you take into consideration the dimensions of this lot you’re looking at. If you’re interested in finding an area with a greater cost range,you must take note that lots of the bigger houses might have to be re-sold until they’re offered,meaning you’ll have to pay a little more for your home real estate market. If you search for a home,you should check at each part of the home including the design,as well as the design,and also the state of the home,and talk to a Realtor regarding the seller. Since you wish to ensure that you are receiving the best price possible for the wealth you would like to do so before purchasing.
Vancouver Top Overview
This city is a cosmopolitan,contemporary and eclectic city that is the biggest in British Columbia with affordability of housing in Canada. This historic and beautiful town is an area of varied culture,elegance and fantastic journey opportunities. The city has many recreational and industrial options to appeal to the different kinds of travelers and has many interesting facts relating to it. Even a Vancouver City Guide provides valuable information regarding the city including its historic history,cultural significance,popular attractions,and recreational pursuits. The manual explains why the city is so popular among both national and international travellers.
Vancouver Neighbourhoods offers a huge array of different locations to remain as well as go to along with various kinds of activities to do along with the different solutions that are provided. Whether you are trying to find the latest apartments and also luxury lofts,or maybe you are searching for a location near the beaches for a day of relaxing as well as sunning,there is a exciting and special option for you. We have listed some of the best Vancouver houses that you may locate useful to aid you locate your perfect location to call house:
B.C.. The State of the Province of British Columbia: Natural Beauty: * British Columbia is a major city in western Canada,and the capital of Canada’s Northwest Territories alongside Burnaby and Richmond. It is also the largest city in the province of British Columbia. Vancouver is the largest city in the Pacific Rim Canadian province of British Columbia. A Major City at Western Canada: * Vancouver is the main town of British Columbia. An Important Metro Area in Canada: * Metro Vancouver has more than 350 municipalities.
Closest Cities
Those that are within a brief range from West Vancouver ought to be thought about when determining where to live. This consists of the cities of Surrey,Langley,and also Delta. The cities of West Vancouver are loaded with employment possibility,together with good colleges and all the social amenities that the city has to use. You may desire to see the Surrey Chamber of Business Web Site below if you want to learn more about the areas near West Vancouver residential market.
Schools
Vancouver School is just one of the very best schools in town and among the very best personal elementary schools in the City of Vancouver. The secondary schools feature an impressive program for preparing trainees for college programs. Along with this,there are numerous activities offered,such as the great Exterior activities,which will make your children have a possibility to check out the natural world around them. Some institutions are: York House,Crofton House,West Point Grey,Vancouver College,Hastings Elementary School.
Yoga exercise Studios – They are at areas like YYoga,Oxygen Yoga & Fitness,and much more. If you such as to workout,this is an excellent place to visit. It’s actually my preferred place to go to for yoga exercise courses. This is just one of the many reasons why I go to Vancouver. The most effective areas to consume in Vancouver are places like this. They provide something different. Plus,it’s constantly fun to watch other people exercise. When you are done have an eat in restaurants at the globe popular Gastown restaurant The old Spaghetti Factory.
How to Create Wealth With Canadian real estate
Buying a rental property can be difficult for first-time home buyers. There are risks in buying a rental property that has to be weighed against the potential advantages that buying a rental may bring. If buying a rental property,a buyer should look at buying and holding property for a time period and collect favorable cash flow to store up for that whole retirement. The process of real estate investment is if you get rents from your renter,which pays off your mortgage. It is a less risky investment than just buying and speculating in real estate. When you’re a landlord you’ll be able to sleep at night. This report will explain how buying and holding property differs from buying and selling real estate.
It’s crucial to bear in mind that whenever you’re investing which you’re not likely to find an equal number of returns from your retirement budget because these home investments are most likely to depreciate faster compared to a investment could. This usually means that you’re likely to be forced to have a portion of your portfolio that is still getting a high rate of recurrence by holding them rather than selling them so as to reduce your risk to the disadvantage. Among the important differences between buying and keeping at the real estate market and in the rental market is that in the real estate market you can take some of the risk from the equation by allowing yourself to buy as a long-term capital gain when you buy and hold. This isn’t true with rentals and your cash flow will need to be maintained and funded in order to keep to generate rental income.
Buying and holding needs a whole great deal of research and prep. First,ascertain how much cash flow you are expecting from your property. Once you understand that,examine the property and find enhancements or any repairs that you can do in order to increase the value of the property. It’s necessary to do this research completely. You will have to visit with a professional real estate agent who has experience in buying and holding properties. This individual will help you understand how to create a retirement plan which works with this particular strategy. You will find the ideal property that fits your requirements,but just remember you have to know the ideal time to buy and hold.
Source: -
15 Reasons Why You Shouldn’t Ignore Metro Vancouver real estate investments
There are many Real Estate Investment opportunities available to investors with capital. A buyer has many different choices when you buy distressed property. Buying distressed property at an auction is the most typical method of buying foreclosures. The CREA Canadian Real Estate Association will be the main advocate for buying distressed property in auctions. At a time when banks and mortgage companies are liquidating their assets to pay off the debts,banks often sell foreclosed properties at auction to recover some of their losses. This is a excellent way to buy bank owned at an auction. CREA believes that buying properties at auctions provide investors a excellent opportunity to own an investment property at little or no danger.
Buying foreclosure properties in the auction can be a way to get a investment property. The Canadian Real Estate Association works closely with all the property owners to be able to make sure that conditions are maintained during the procedure. There are several methods to buy distressed properties at auction. Property buyers can choose to buy any type of property or investor may buy residential or business properties. A real estate investor could make the most of buying distressed property at an auction by simply purchasing the whole property in 1 trade at a price. This is advantageous to the investor only since they don’t need to earn a complete purchase of your property.
Strategies of Selling Your Home – The Fundamentals of Staging Your Home
If you’re planning to sell your house and are interested in being successful then you have to be in the point to be able to accomplish your goal with real estate agents and home buyers alike. You shouldn’t rush your procedure because in the event you do you will never be able to receive the absolute most from the housing market. You have to be prepared with the right mindset to be successful. You’ve got to be in the perfect position at the ideal time to be able to succeed and prepare your house for sale at the greatest manner that is possible,such as decluttering and deep cleaning. If you continue doing things the ideal way like staging your house with a professional stager,then your home value will increase prospective buyers will be prepared to place an offer in your condominium.
Organizing and cleaning your home and Maintaining your home is the most crucial tips for selling your home. You are going to have more first time home buyers into your home if it’s in order. You might even use Multiple Listing Service to sell your property. Craigslist comes with a search box which will allow you to look for curious first time home buyers through the local area using a buyer resource center. Home inspections can be located from these listings,if you would like to do a pre-inspection and enhance home value. The Buyers may also want to learn about mortgage rates and sometimes even about personal loan.